Sunday, March 11, 2012

Going Nuts

During the work week, I often get a craving for sugar after lunch, but I also need something more substantial to get me through the last few hours of the day. Granola bars usually work, but I get kind of sick of the sticky-sweet texture.

These cookies are a good compromise between sugary treat and healthy snack - they have almonds, walnuts, and whole-wheat flour. The whole-wheat flour gives the cookies a chewier texture than white flour, while the almond meal keeps the batter from being too dry or cardboard-tasting (common complaints when using whole-wheat flour in baked goods). I buy almond meal from Trader Joe's - it's a little coarser than almond flour, but it's also cheaper and works well in many baked goods (like this one).

Chocolate chip double-nut cookies

  • 1 cup (2 sticks) unsalted butter, at room temperature
  • 3/4 cup granulated sugar
  • 3/4 cup brown sugar, packed/li>
  • 1 teaspoon vanilla extract
  • 2 eggs
  • 1 cup whole-wheat flour
  • 1 1/4 cup almond meal
  • 1 teaspoon baking soda
  • 1 teaspoon salt
  • 2 cups semi-sweet chocolate chips
  • 1 cup chopped walnuts

Preheat the oven to 375°F. In a medium bowl, combine the flour, almond meal, baking soda, and salt and mix well. In a large bowl, beat the butter, sugar, and vanilla extract together until creamy. Add the eggs in a beat well. Gradually add the flour mixture in and mix well. Stir in the chocolate chips and nuts.

Drop the batter by teaspoonfuls onto an ungreased cookie sheet. Bake for 9-10 minutes, until golden. Cool for a few minutes on the cookie sheet, then remove and let cool on a wire rack.

Sunday, February 19, 2012

Too many lemons

I enjoy lemons, especially in baked goods. When I was young, my mother used to make lemon squares for a lot of get-togethers, and I always got to help squeeze the lemons. It's become one of my go-to recipes as well. For the holidays, I made a large batch of lemon squares and some shortbread for my coworkers:

I bought about two bags of lemons to make those, since each batch of lemon curd uses 4-6 lemons. Almost every other citrus recipe I've come across calls for two lemons at most, so you can imagine how flavorful these treats are.

In January, I came back to San Diego with a bag of lemons from my uncle's tree, only to find that my roommate had also brought some back from her family's tree. Too many lemons! I finally got around to making another batch of lemon curd this weekend, and was fortunate enough to come across a recipe that would work perfectly with it.

Lemon curd-filled almond muffins

Make a batch of easy lemon curd. This method is pretty easy and creates a very smooth, delicious curd. If you like your desserts tart, up the lemon juice a little and reduce the amount of sugar. Refrigerate the curd overnight to let it thicken.

Follow this recipe for almond dulce de leche muffins, omitting the cinnamon and substituting lemon curd for the dulce de leche. I modified the ingredients a bit further by using half whole-wheat flour and regular sugar.

Enjoy! I'll be eating these for breakfast all week!

Monday, January 16, 2012

Stuffed pizza for a winter day

Here comes my annual post. I've been craving pizza lately, so I made this kale-stuffed pizza for this week's lunch.

This recipe started originally came from an American Heart Association booklet as spinach-stuffed pizza, complete with a recipe for dough and instructions for a marinara-mushroom topping. I always take the easy route and just buy pre-made whole-wheat pizza dough from Trader Joe's. I'm not very big on mushrooms, either, so I usually go with extra cheese and pesto on the top instead. And while spinach is nice, it often gets a little to soggy between the crust. I've been using heartier greens like kale and collard greens in its place - they hold up better, give off less water, and the flavor is not much different. This recipe is very adaptable, so you can swap out ingredients to suit your own tastes.

Vegetable-stuffed Pizza

  • 1 package of whole-wheat pizza dough
  • 1/2 pouncd fresh spinach OR 1 bunch of other leafy greens (kale, collard greens)
  • 1 pound of mozzarella cheese, shredded
  • 1 cup marinara, pesto, or other sauce
  • 3-5 cloves of garlic, chopped

Preheat the oven to 475°F and place the oven rack in the middle. Grease a pie tin with olive oil, making sure to cover the sides and creases.

Split the pizza dough into two equal pieces. Set one half aside. Stretch the other piece out to cover the bottom and sides of your pie tin. Prick the bottom of the dough with a fork at 1-inch intervals. Bake the crust for 4-6 minutes, then remove to a rack and let cool. Lower the oven temperature to 450°.

While the bottom crust is cooling, wash the vegetables and chop them into bite-sized pieces. Heat a skillet with about 1 tablespoon of olive oil. Add the garlic and some salt in once hot, and let the pieces brown for about 1 minute. Add the vegetables in and stir occasionally, until they are bright green and wilted. (If you use kale or collard greens, you may also want to add a tablespoon or two of water about a minute after you add the vegetables to "steam" them. This will make them a little more tender.)

Layer about 3/4 of your cheese and all of your vegetables on top of the crust. Press the filling down with a spoon if it's higher than the sides of the pie tin. Stretch your second piece of pizza dough out to cover the top of the dish, tucking the edges around the bottom crust layer. Cut a 1-inch slit in the center of the top crust.

Top the crust with your sauce of choice and the remaining cheese. You can also add other toppings here, like sliced tomatoes or mushrooms.

Bake the pizza at 450° for 15 minutes. Reduce the temperature again to 400° and bake for another 5-10 minutes until the edges are a deep golden-brown. Remove and let cool for 10-5 minutes before slicing.

And here's some music for you, courtesy of Jagjaguwar Records. Bon Iver, who was recently nominated for four Grammys, makes absolutely beautiful music. Their latest self-titled album has been on repeat on my iPod since it came out in June. If you enjoy the tracks below, please consider purchasing their album.

Tuesday, February 22, 2011

Pumpkin Lasagna

It's been a while since I've made a post here, but at least I brought you something good!

As a kid, lasagna was always one of my favorite dishes. My sister and I loved to help my mom layer the ingredients, but we could never quite agree on the ratio or the order of them. The summer before my junior year of college, when I moved off-campus (and away from dining halls), I went on a huge recipe-finding spree. I found a recipe for Florentine Lasagna on the back of a pasta box that turned out to be a total winner. Since then, I've made it countless times and it's become something of a signature dish. Normally the only thing I vary in my recipe is the cheese (all mozzarella vs. half mozzarella, half ricotta), but then I heard about pumpkin lasagna.

This past October, my mom and aunt traveled to China. She got back shortly before I came home for the weekend, and she raved about the pumpkin lasagna my aunt had at one of the restaurants on their trip (weird, right?). I had been on a bit of a squash kick, so I bought a few pumpkins when they were on sale. The first was roasted and mashed into a normal lasagna with marinara sauce — bad idea. The tomato flavor completely masked the the pumpkin flavor. My second pumpkin sat on my kitchen shelf until this past weekend, when I decided to do something before it liquified. I read up on a few recipes on TasteSpotting and FoodandWine.com to get some ideas, but eventually decided to wing it. I ended up with a very tasty lasagna that was full of pumpkin flavor.

Pumpkin Lasagna

  • 1 pumpkin, roasted or steamed then mashed; or 1 large can pumpkin puree (28 ounces)
  • 1 to 2 tablespoons butter
  • 1 1/2 cups milk or cream
  • 4 cloves garlic, chopped
  • 1/2 teaspoon dried rosemary or sage
  • 1/4 teaspoon nutmeg
  • 1 pound spinach, cooked and drained
  • 1/2 onion, diced
  • 1 package lasagna noodles
  • 16 ounces mozzarella cheese, shredded

Boil the lasagna noodles according to package directions.

In a medium saucepan, melt the butter over medium heat. Once melted, add the garlic, the dried rosemary or sage, and the pumpkin puree and mix. Add 1/2 cup milk and stir, then add more by 1/4-cup portions, stirring well after each addition, until the puree is soft and easily spreadable. (Honestly, I just poured straight from the milk carton until the puree looked right. I don't actually know how much milk I added.) Add the nutmeg in; be careful not to add too much or it'll be overpowering. The puree should smell buttery and slightly spiced.

Preheat your oven to 375° F.

Once the noodles are drained and the sauce is ready, pour 1/4 cup milk into the bottom of your casserole dish. Put a layer of noodles in, then a small handful of cheese (just enough to lightly cover the noodles). Layer on half of your spinach, spreading evenly, then follow up with a little more than a third of your pumpkin puree. Cover with another handful of cheese. Repeat this process one more time — noodles, a little cheese, remaining spinach, pumpkin puree, more cheese. The final layer is noodles, remaining pumpkin puree, and remaining cheese.

Bake for 30-45 minutes, until the cheese is melted on top and the sauce is bubbling slightly on the sides. Cool for 10 minutes before slicing and serving.

Bonus!Recipe:

For my normal lasagna, I use a bottle of Trader Joe's marinara instead of the pumpkin puree. You can swap half the mozzarella out for 8 ounces of ricotta if you like. Mix an egg and some of your cheese (either half the mozzarella, or all of the ricotta) into the spinach.

Layering: Two spoonfuls of sauce on the bottom of the pan (to cover it), noodles, half of the spinach mix, a third of the mozzarella cheese, and a third of the sauce; repeat once. Top with the last layer of noodles, remaining sauce, then cheese. Bake as directed above.

Tuesday, November 3, 2009

Halloween Trick-or-Sweet

I threw a small Halloween food party this past weekend with my roommate. We had green tea cupcakes, pumpkin butter shortbread, cheesecake brownies, caramel apples, and lychee (pictures below).

My mom was awesome and knitted me the sweater from Coraline (the movie) using the pattern from the official website. Then I sewed on the stars and made a dragonfly barrette to complete the outfit. Then on Wednesday we carved pumpkins, and I made the cat from the movie to go along with my outfit:

Here's what I made for the party.

Frankenstein Green Tea Cupcakes

with chocolate buttercream hair and white chocolate chip eyes

Cheesecake Brownies

Red Wine Caramel Apples

Pumpkin Butter Shortbread Sandwiches

Lychee and Blueberry/Raspberry Eyeballs

Sorry for the poor photo quality; I was in a rush.

Tuesday, June 16, 2009

Hooray!

My awesome cousin Kimi made a mention of my blog in her entry here! It's got a recipe for No Knead Bread, which is about the easiest time you'll ever have making anything if you read the recipe and then watch the video. She also included some other tips about the details (from me) and variations on it (all her).

My roommate sent me a link the other week to a website called the Black Cab Sessions. It's got a bunch of videos of indie artists who have come to England and are then filmed singing a song while sitting in the back of a moving cab. The idea is extremely cool, and very well executed. I would highly recommend watching My Morning Jacket. The lead singer, Jim James, has an absolutely incredible voice. Enjoy!

Friday, May 22, 2009

Carrot Mac and Cheese

When I was younger, I never liked cheese by itself- something about the smell and the texture just weirded me out. But nowadays, I can never get enough- especially if it's mac and cheese! When I saw this recipe in Food and Wine, it intrigued me because it was such a different take on "healthy" mac and cheese.
I do have to say, my first attempt at the recipe — minus tarragon, and with more cheese — was way too bland and carroty/orange-y (yes, it called for juice and zest from an orange). This time, I nixed the orange, added half an onion with the carrots, and made sure to put in plenty of salt. The result? Not bad at all!
I'm also including a song in this post, because a few weeks ago I remembered Epitonic, this website that I used to visit regularly in high school. They posted all this awesome indie music for you to listen to and download, along with an in-depth description of the band and suggestions of similar artists. This was the place where I first discovered Spoon, who is now one of my favorite bands. The website is pretty much defunct and very difficult to navigate properly (it died shortly after they redesigned it), but the music is still up there. I browsed through and got a whole bunch of new music, but this one in particular jumped out at me.
Etienne de Rocher - Out to Sea. (Artist page here.)

Carrot Macaroni and Cheese

(adapted from Food and Wine)
  • 3 medium or large carrots, sliced thinly
  • 1/2 small white onion, diced
  • zest (in large strips) and juice of one small navel orange (optional)
  • salt and pepper
  • 3 cups penne rigate or other short pasta
  • 6 to 8 ounces sharp cheddar cheese, shredded
  • 1 tablespoon chopped tarragon (optional)

- Preheat oven to 350*F.
- In a medium saucepan, combine carrots, onion, orange zest/juice, and 1/4 cup water. Season with salt and bring to a boil. Cover and simmer for 20 to 30 minutes, until the carrots are soft. Discard the zest, then puree the rest of the mixture in a blender until smooth.
- Meanwhile, cook the pasta until al dente. Drain, reserving 3/4 to 1 cup of the pasta water.
- Return the pasta to the pot, along with the carrot puree and water, and cook over medium heat, stirring frequently, until the pasta is coated with a thickened sauce, about five minutes.
- Stir in 3/4 of your cheese and cook, stirring, until creamy, about two to three minutes. Season with salt, pepper, and tarragon.
- Transfer the pasta to a medium baking dish and top off with the rest of the cheese. Bake until the cheese is melted and lightly browned, about 20 minutes. Let stand for five minutes before serving.

Enjoy! I will probably be making a post for zucchini bread some time soon, after I make it this weekend.

Sunday, March 1, 2009

Chocolate-Haupia Pies

Here's the recipe for the Chocolate Haupia mini pies I made on Valentine's Day.

Perfect Pie Crust

(adapted from The New Best Recipe)
makes 7-8 mini pie crusts, or one 9-inch pie crust
  • 1 1/4 cups all-purpose flour, plus more for dusting
  • 1/2 teaspoon salt
  • 1 tablespoon sugar
  • 7 tablespoons cold unsalted butter, cut into 1/4-inch pieces
  • 4-5 tablespoons ice water

- In a medium bowl, sift the flour, salt, and sugar together.  Add the butter in pieces, either pulsing in a food processor or mixing in with fingertips, until the mixture is a pale yellow and resembles coarse crumbs, with the butter bits no larger than small peas.
- Sprinkle 4 tablespoons of the ice water over the mixture.  With a rubber spatula, use a folding motion to mix.  Press down on the dough with the broad side of the spatula until the dough sticks together, adding up to 1 tablespoon more ice water if the dough will not come together.  Flatten the dough into a 4-inch disk, wrap in plastic , and refrigerate at least 1 hour or up to 2 days.
- Remove the dough from the refrigerator (if it's been more than 1 hour, let it sit until it's malleable).  Flour your work surface and slowly roll the dough with a pin by rolling a quarter turn of the disk with your right hand, then turning the dough on the surface and repeating the motion.  Continue to turn your dough and flatten it in quarters until it is 8 to 9 inches in diameter, then lift it up onto your rolling pin and place it upside down.
- If you're making mini pies, roll your dough out in length another few inches, then cut out circles with about a 4" diameter.  Remove the circles and press them into muffin tins by draping them over the top and lifting the edges to ease the dough into the lower creases of the tin.  Trim the excess edges and crimp with a fork if desired.  Re-roll the rest of the dough and cut out more 4" circles.
- If you're making one 9" pie crust, roll your flattened circle out another 3-4" wider than your pie plate.  Roll the dough into your pin again and unroll it evenly over your pie place.  Life the edges of the dough and ease it down into the lower creases of the pan.  Trim the overhanging dough and crimp the edgeswith your finger or a fork.
- Refrigerate your dough-lined plate or muffin tin until firm, about 40 minutes, then transfer to the freezer for an additional 20 minutes.  (This sounds ridiculous, but Best Recipe gives a good reason for it.  Refrigerating the dough relaxes the gluten so the crust doesn't shrink during the baking, and freezing it helps make the dough flaky.)
- Preheat your oven to 375*F.  Remove your pie crust from the freezer and line the crust(s) with heavy-duty foil both inside and over the shell, folding the edges of the foil to shield the edge of the crust.  Distribute pie weights, pennies, rice, or beans along the bottom (fill the entire inside of the shell if you are using rice or beans, since they are lighter).
- Bake the crusts until the dough looks dry and light in color, 25-30 minutes.  Carefully remove the foil and weights by gathering the corners of the foil and pulling up and out.  For a partially baked crust (if you're using a filling that you are baking again later), continue baking until light golden brown, another 5-6 minutes.  For a fully baked crust (which is what I used for this refrigerated-filling pie), continue baking until deep golden brown, another 12 minutes.  Transfer the crust(s) to a wire rack.

As for the pie filling, I just used instant Jello Chocolate Pudding mix, Coconut Gelatin mix from the Asian grocery store, and Cool Whip.  However, to make a truly authentic and homemade version, follow the recipe posted here Enjoy!

Monday, February 16, 2009

Valentine's day sweets

Even though Valentine's day is supposed to be a day for lovers, I like to indulge in the cheesiness and spread the cheer around. So this year I had a party and made a LOT of sweets. Here's what I made:

Chocolate Haupia (coconut pudding) Mini Pies

Strawberry Shortcakes

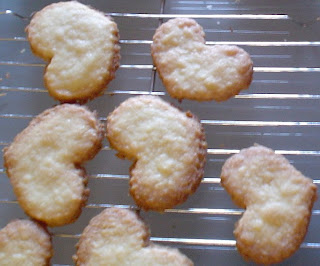
Shortbread Hearts

Oatmeal Lace Cookies with Chocolate

Red Velvet Cupcakes with Cream Cheese Frosting

Vanilla Cupcakes with Guava Buttercream Frosting

Recipes to follow in subsequent entries. If you're dying for a particular one right now, let me know; I'll be happy to post it.

Sunday, October 12, 2008

It's almost Halloween...

Well, three weeks from it, anyways. My roommates and I made witch hat cookies yesterday, but when we piled them up on the plate it ended up looking more like Chocolate Island from Super Mario World. So if you're wondering what that little green thing is- it's a Dino-Rhino.
Anyhow, recipe as follows, and a song from Patrick Wolf called Ghost Song to accompany the witch hats.

Witch Hat Cookies

  • 2 cups all-purpose flour
  • 1/2 cup unsweetened cocoa powder
  • 1/2 teaspoon baking soda
  • 1/2 teaspoon baking powder
  • 1 teaspoon salt
  • 16 tablespoons (2 sticks) unsalted butter, softened
  • 1 cup packed brown sugar
  • 1 cup packed granulated sugar
  • 1 cup smooth peanut butter
  • 2 large eggs
  • 1 1/2 teaspoons vanilla extract
  • 1 bag Hershey's Kisses

- Adjust the oven racks to the upper and lower middle positions, and preheat the oven to 350*. Grease two baking sheets.
- In a medium bowl, whisk together the flour, cocoa, baking soda, baking powder, and salt.
- In a large bowl, beat the butter until creamy, then add the sugar and beat until fluffy. Beat the peanut butter in until it's fully incorporated, then beat in eggs in one at a time, and finally add the vanilla extract.
- Spoon small balls of the dough, about 1 inch in diameter, onto the baking sheets, then bake for 10 to 12 minutes, switching the pan positions halfway through.
- Once out of the oven, let cookies cool for 1 or 2 minutes, then stick an unwrapped Kiss in the middle of each cookie.